

How to Use Microsoft Teams on macOS Sequoia
This guide will walk you through setting up Microsoft Teams on your Mac for video calls.
1. Download and Install Teams
Visit the Teams download page, and click “Download for desktop” to get the installer for macOS. After it downloads, locate the fi le in Downloads, double-click it, and allow Microsoft Teams to install.
2. Launch Teams
In the Finder, open Applications, then double-click the Teams icon to start the app.

3. Log In or Register
Log in with your Microsoft account. If you don’t have a Microsoft account, click “Sign up for free” to create an account.
4. Set Up Audio and Video
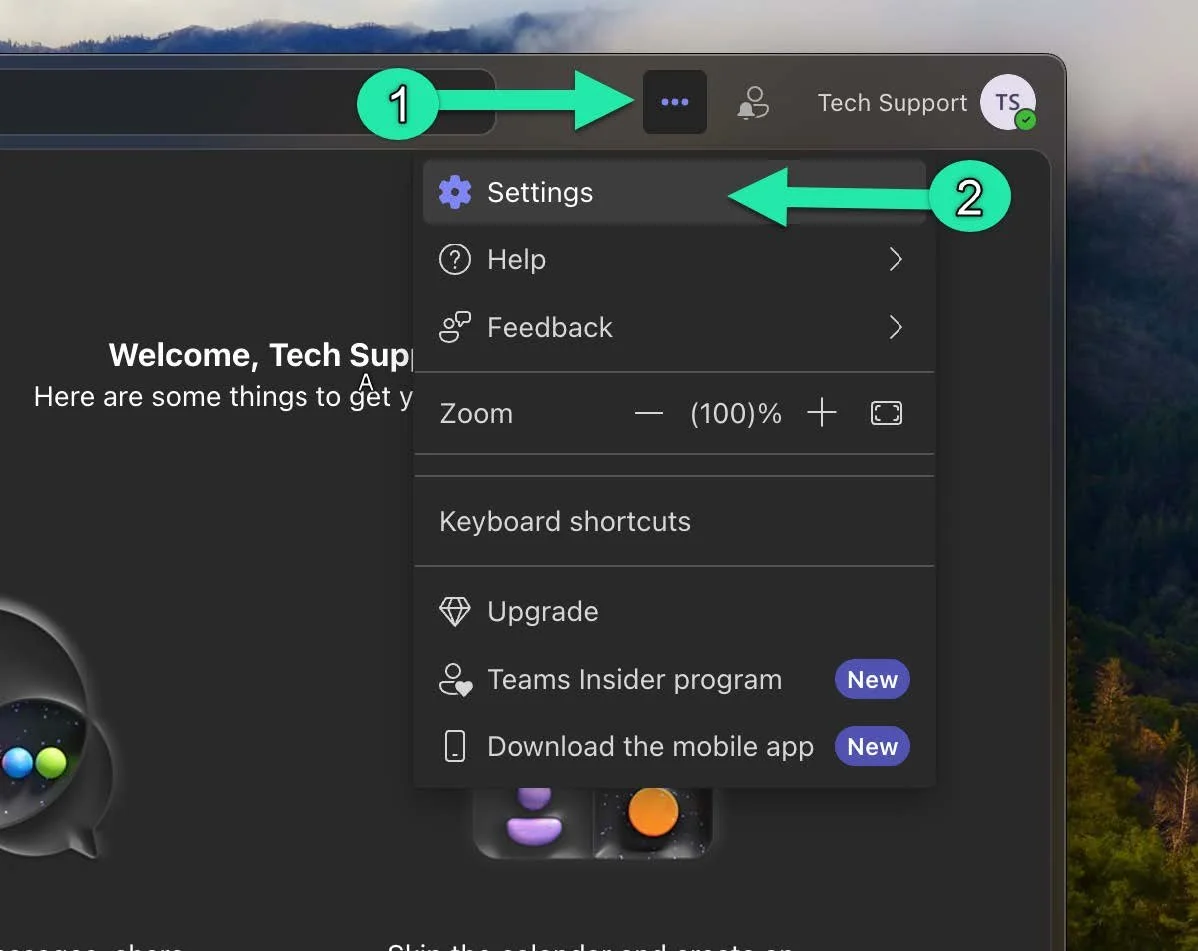
1. Prior to joining a video call, click the three dots next to your profi le picture.
2. Select "Settings" from the dropdown menu.
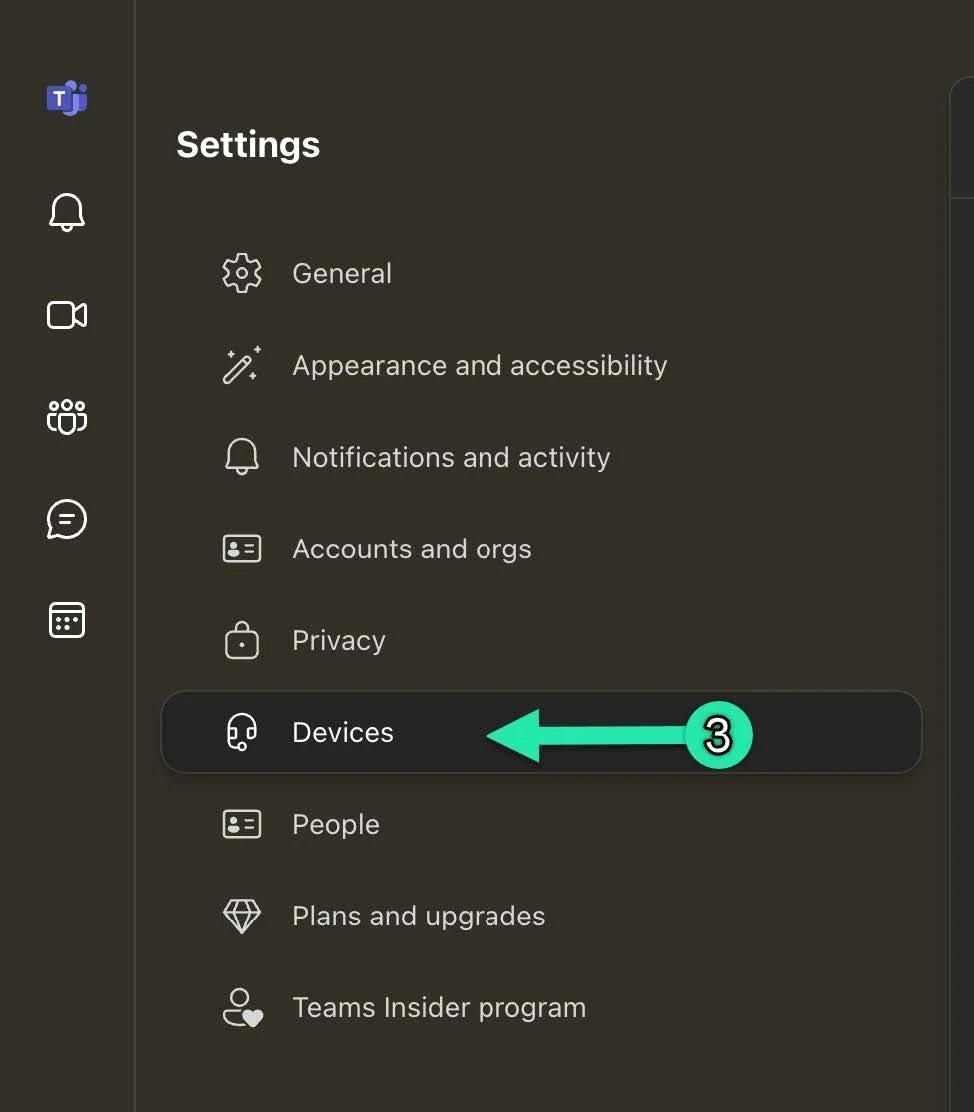
3. In "Settings" go to the "Devices" section.
4. Under audio, check selected devices and verify that the correct speaker is active.
5. Verify that the correct microphone is selected, then use the "Make a test call" option to confi rm that your audio setup is working properly.
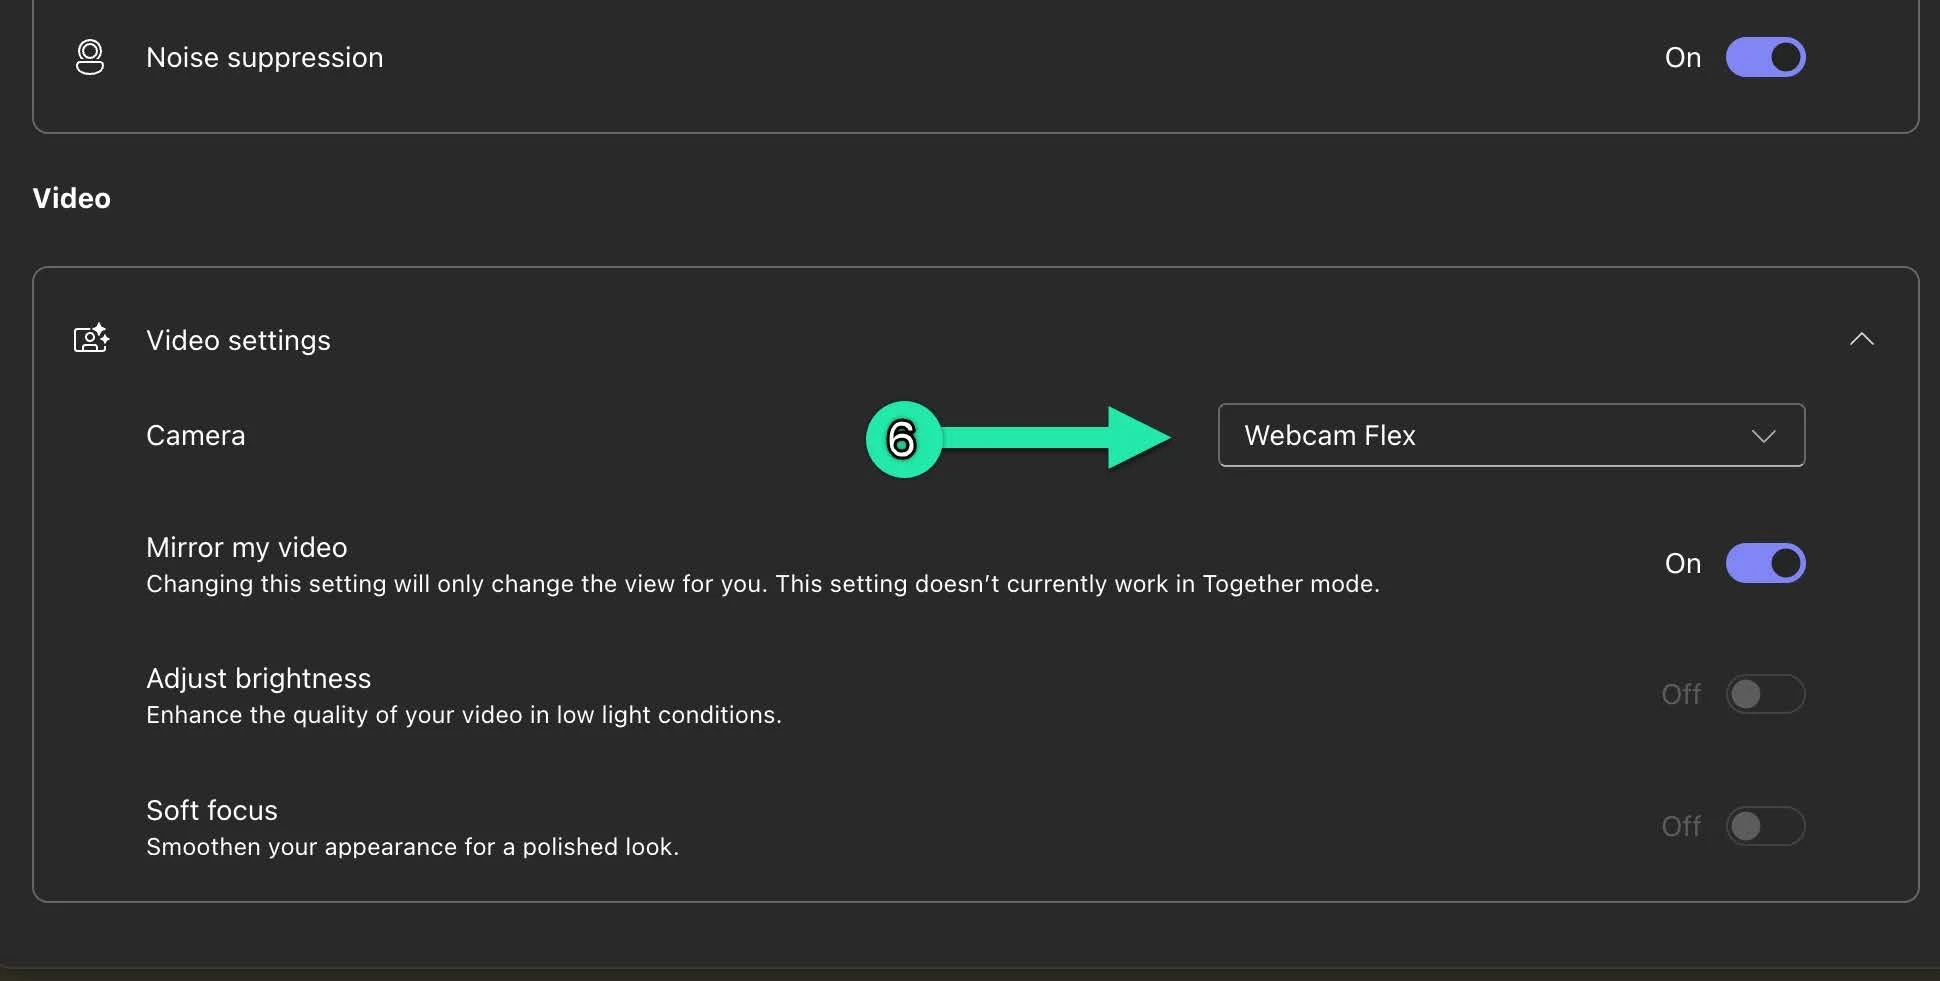
6. Scroll to the "Camera" section, select the correct camera, and check the preview to make sure it’s working properly.

5. Start or Join a Meeting
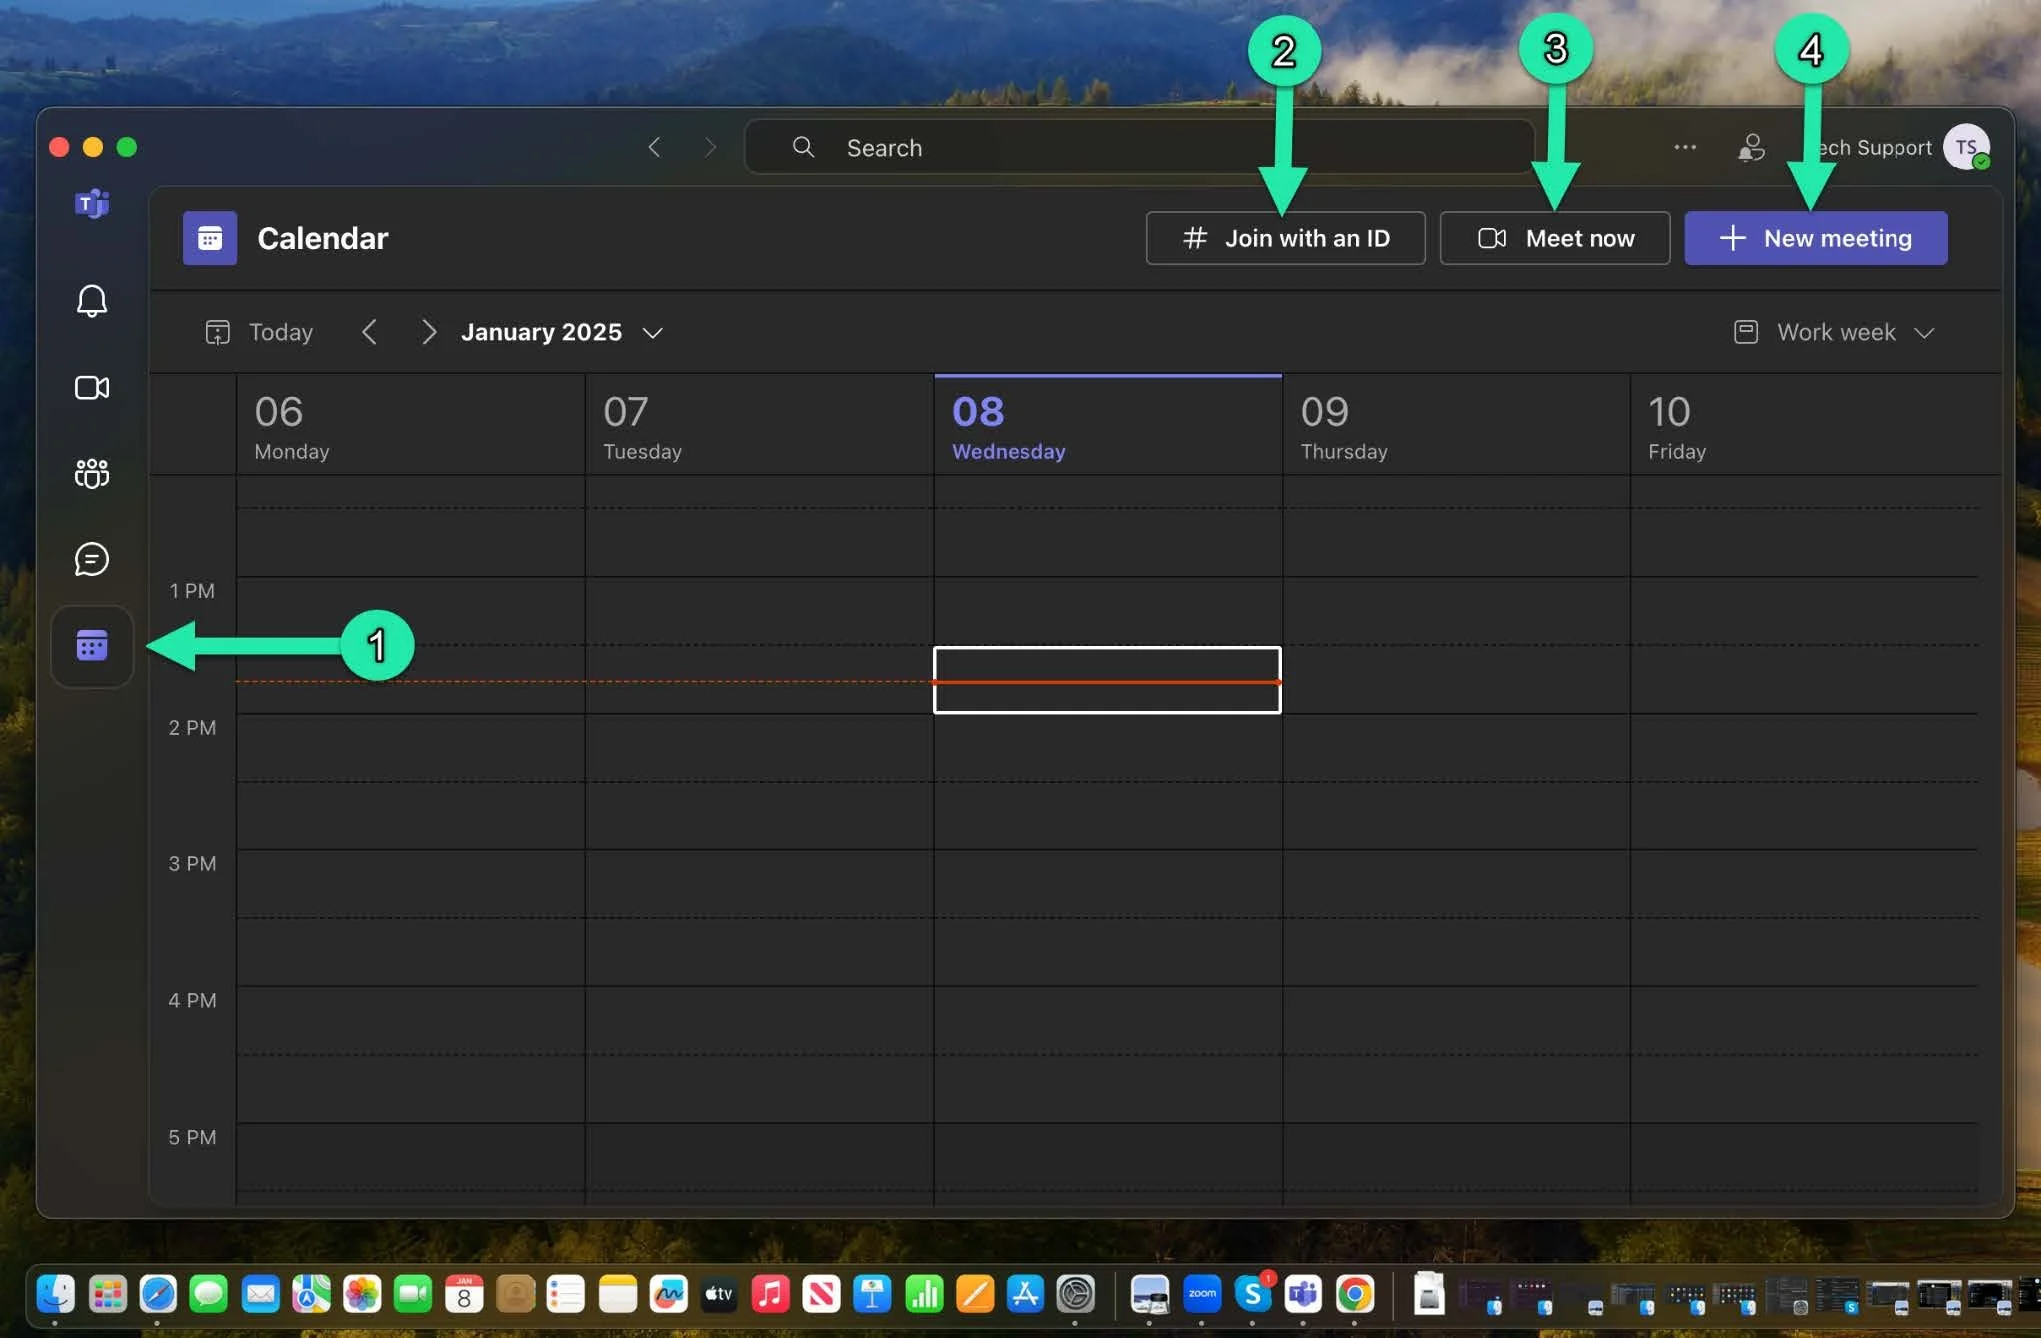
In order to start a meeting in Teams, you’ll need to navigate to the scheduler. Click “Calendar” and enter a meeting ID to join an existing meeting (if you have one) or “Meet now” to start a meeting immediately. Invite people on your contacts list by clicking “Invite.” To schedule a meeting in advance, click “New meeting” and choose a date and time.
6. Keep Teams Updated
Teams auto-updates when an update is available.
7. In-Call Controls
During calls, Teams’ in-call controls are located in the toolbar at the top of the screen, and includes features such as mute, video, share screen, and chat.

● Chat: Opens the chat window to send messages to everyone or specific participants.
● People: Displays the participant list to manage roles and invite others.
● Raise Hand: Allows you to raise a virtual hand to signal you'd like to speak.
● Reactions: Provides quick emojis to show feedback, like thumbs-up or clapping.
● View: Changes the display mode for participants (Gallery, Together, etc.).
● Breakout Rooms: Used by hosts to manage and assign participants to breakout rooms.
● Apps: Access third-party app integrations like polls or whiteboards.
● Leave: Red phone button used to leave the meeting or call.
● More Options (Three Dots): Additional settings for background effects, captions, recording, and meeting details.
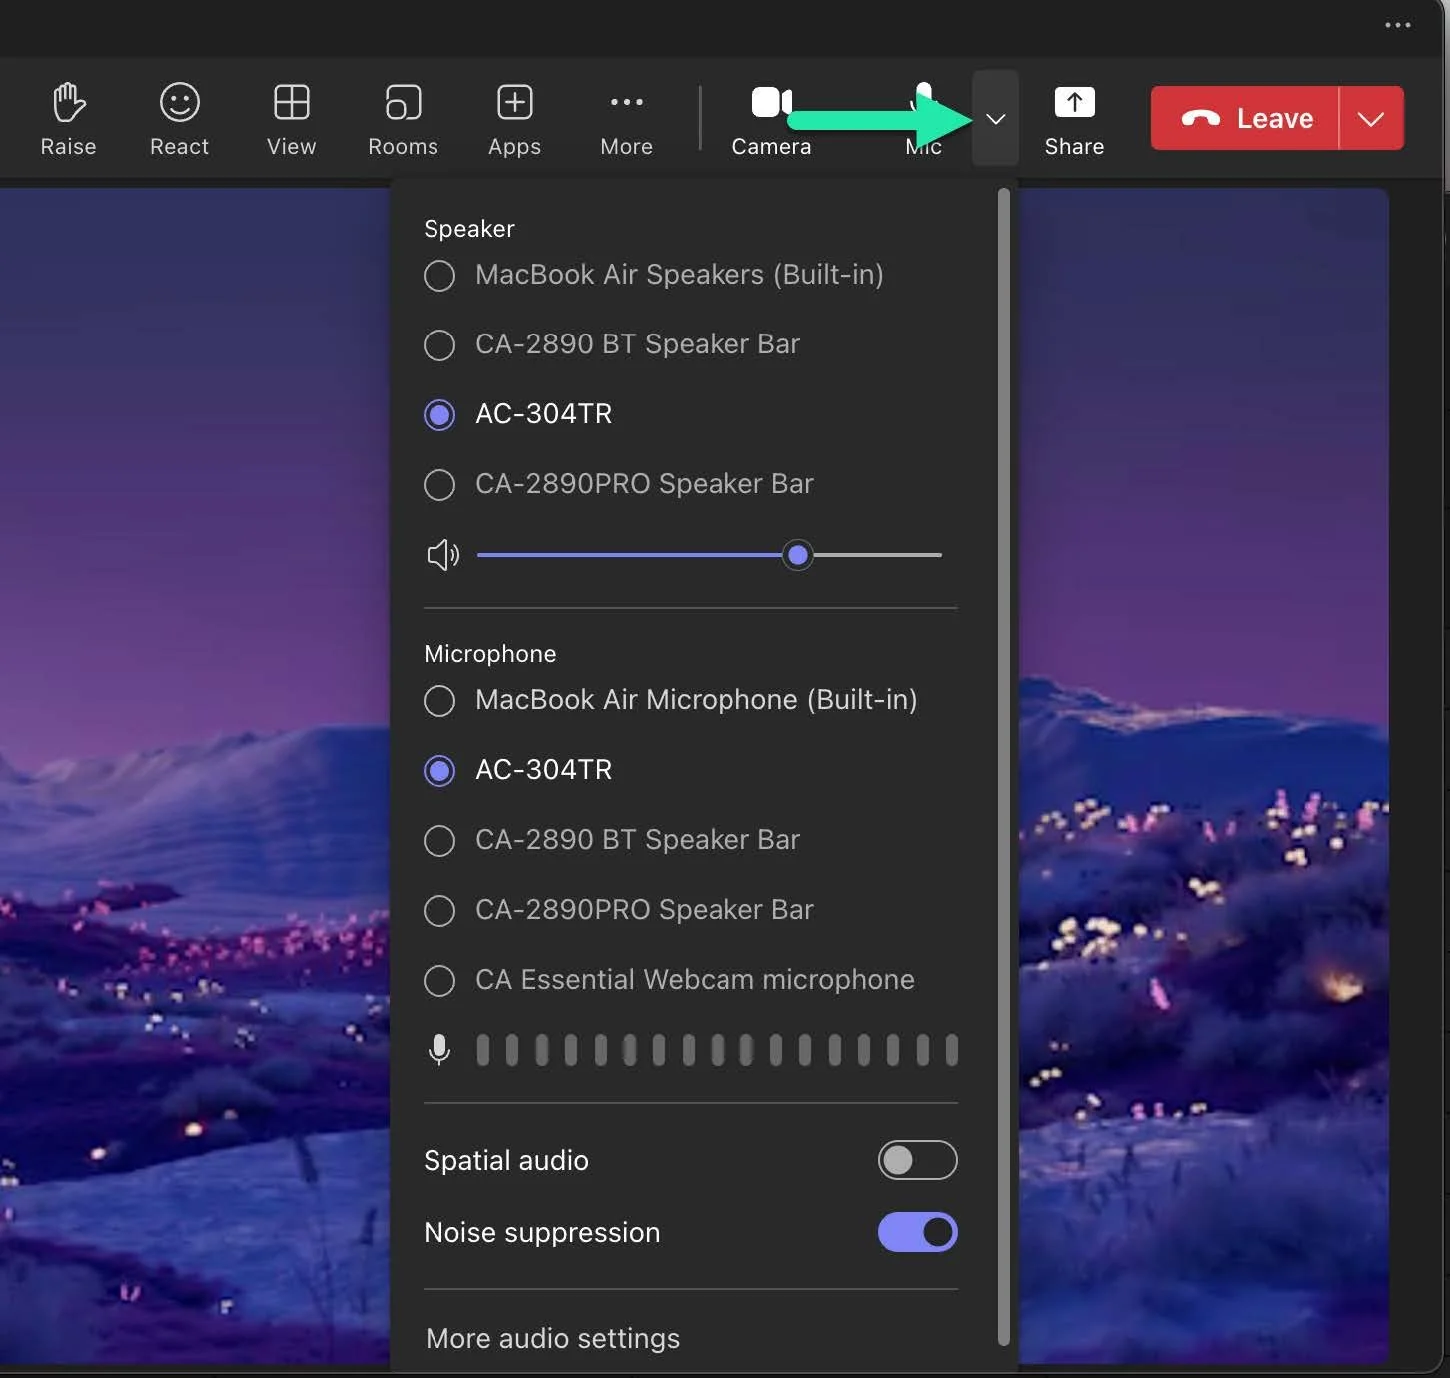
● Microphone: Toggles your audio on or off. A crossed-out microphone icon indicates muted audio, while a plain microphone icon means you're unmuted. You can also click the dropdown caret next to the microphone button to select your preferred microphone from available options.
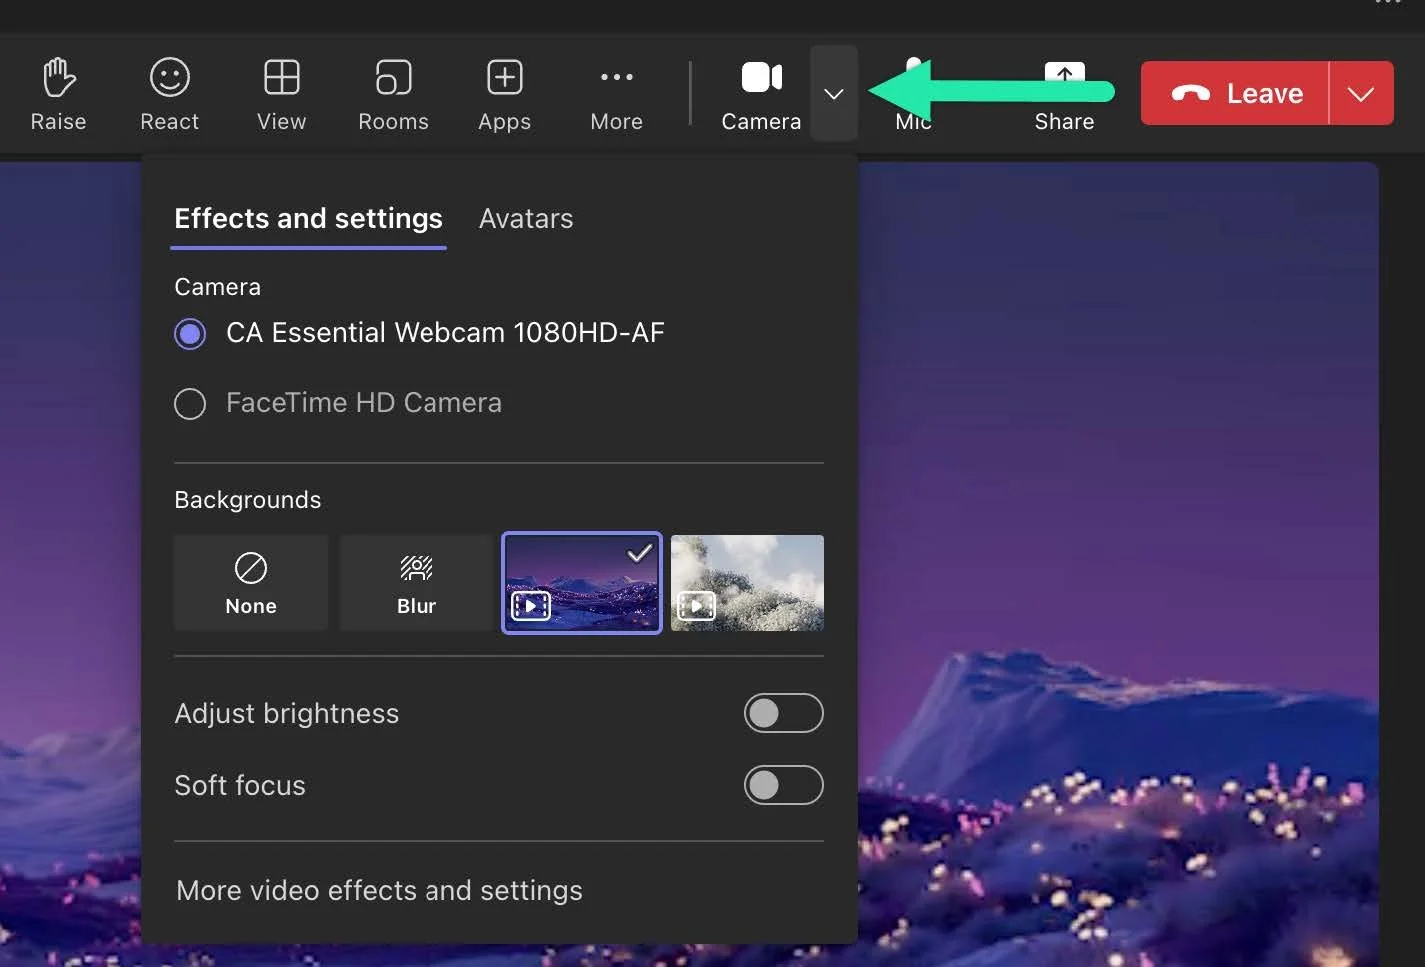
● Camera: Toggles your video on or off. A crossed-out camera icon means your video is off, while a plain camera icon means your video is on. Similarly, clicking the dropdown caret next to the camera button lets you select your desired webcam from available devices.
8. Sign Out or Quit
After a call, click “Leave” to quit. If you are the host, click the down caret and select “End Meeting” to end the call for everyone. To sign out, click your profi le picture and choose “Sign out.”
Summary & Troubleshooting
Now that your webcam is set up for Microsoft Teams on macOS, it's important to test it before your next virtual meeting.
If you encounter any issues with your webcam, please refer to your device’s manufacturer for further assistance. For those using a Cyber Acoustics webcam, please fi ll out the contact form linked below for direct support. Stay tuned for future blog posts from the Cyber Acoustics Tech Support Team to help you get the most out of your computer peripherals.
Contact Support — Cyber Acoustics
Thank you for taking the time to set up your webcam with us. We wish you the best in your virtual meetings, and have a great day!
Enhance your audio experience…
with the AC-404 Professional Headset.
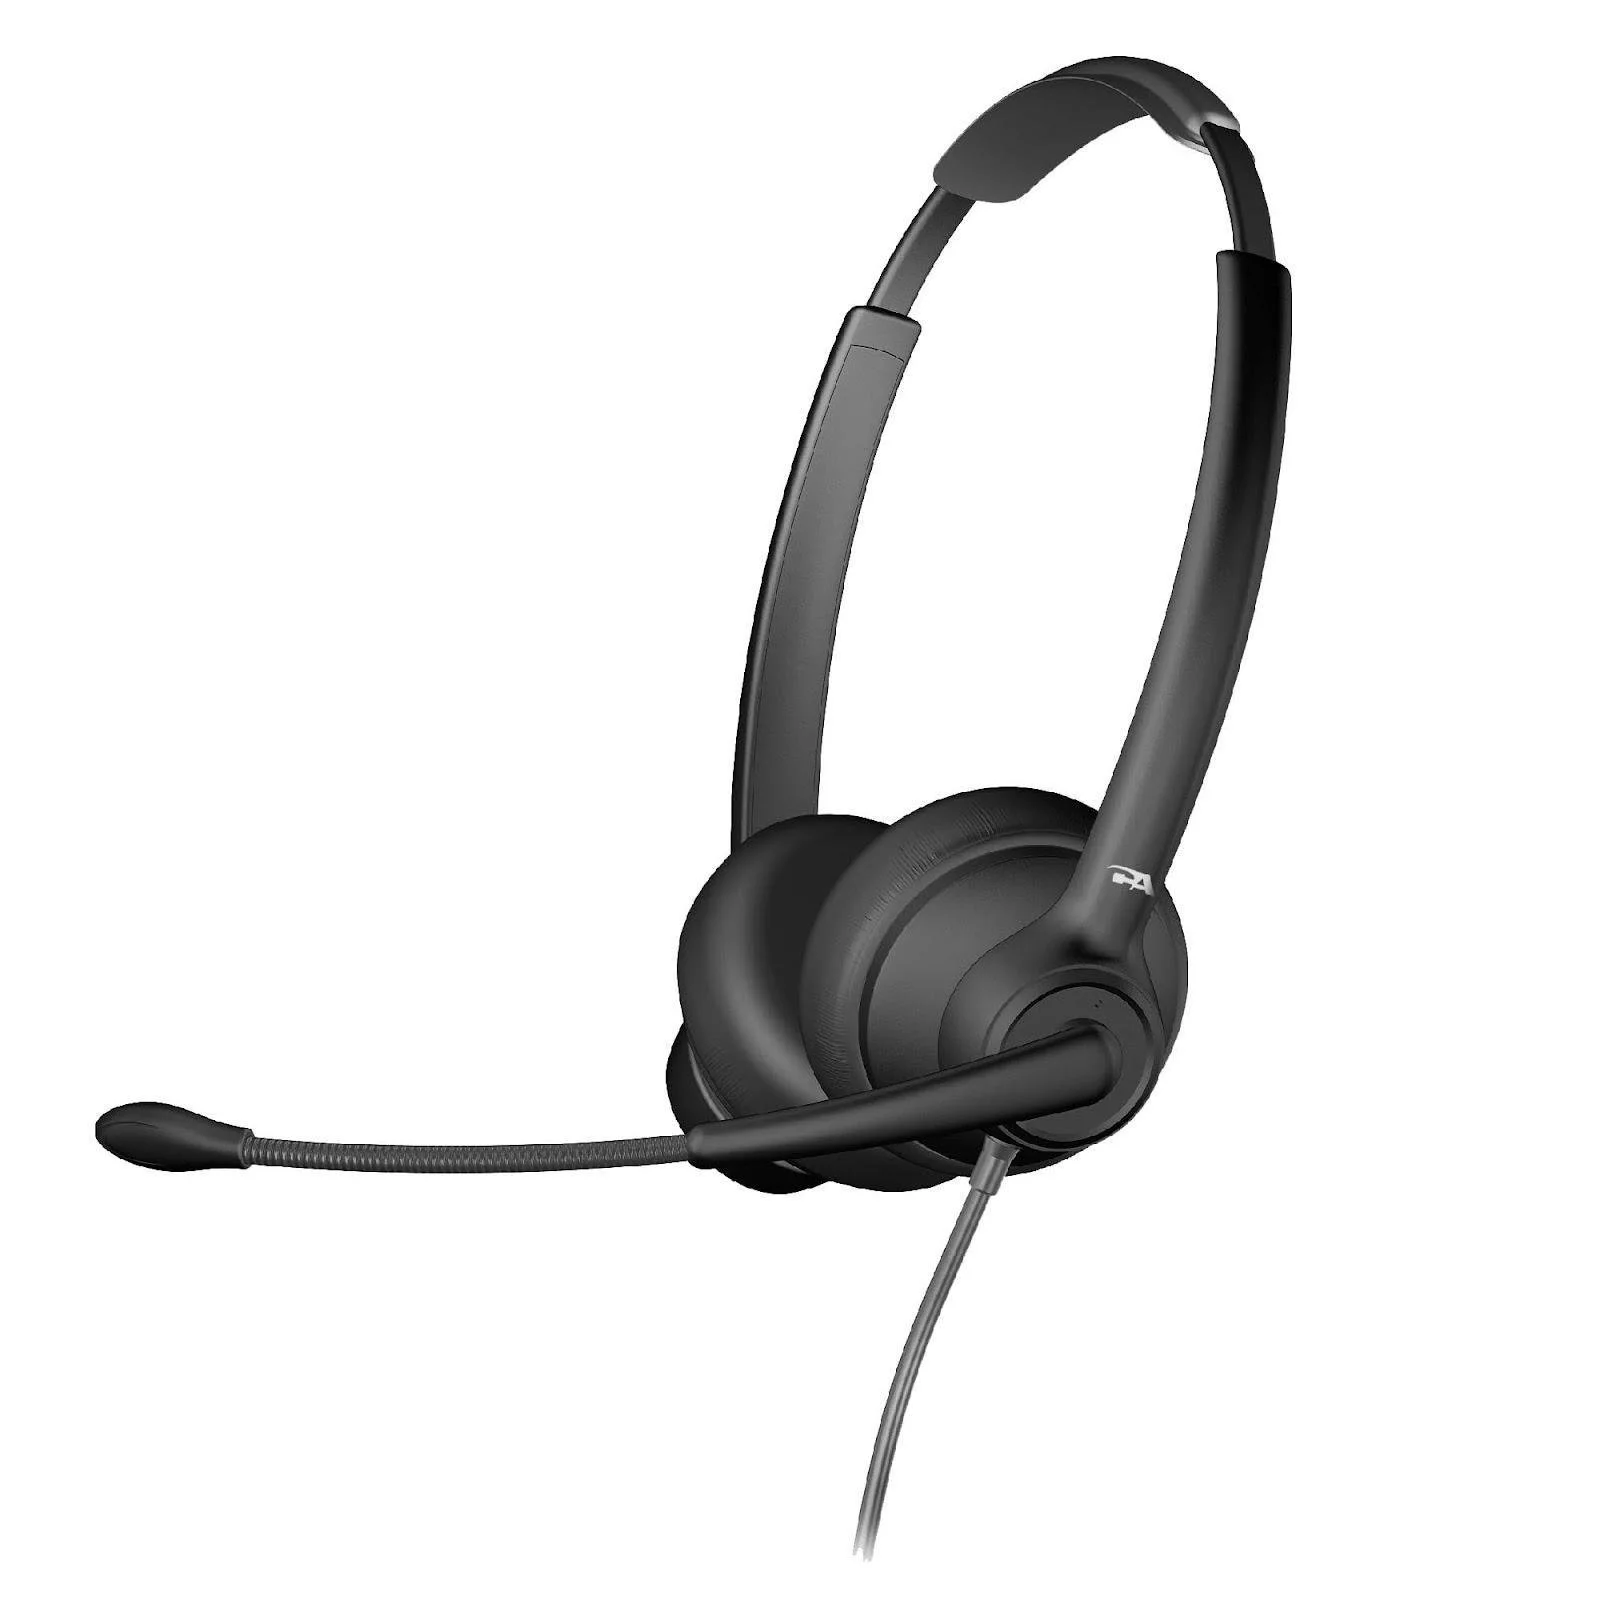
Experience crystal-clear audio with the AC-404 headset, crafted for superior sound quality in a lightweight design. Featuring advanced AI-powered noise cancelation, a unidirectional microphone for crisp voice capture, and premium 40mm drivers, it’s perfect for video calls, online learning, and entertainment.
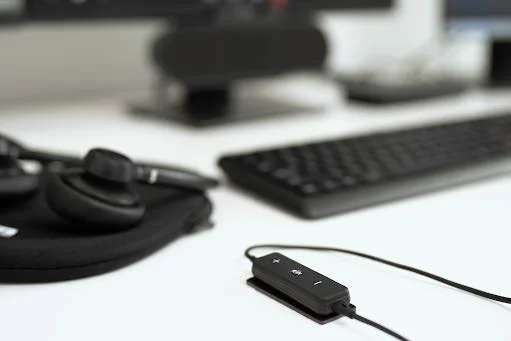
Designed for work, school, or entertainment, this headset ensures effortless setup with plug-and-play USB connectivity. Enjoy enhanced clarity, all-day comfort with adjustable features, and a durable build tailored to your everyday needs.